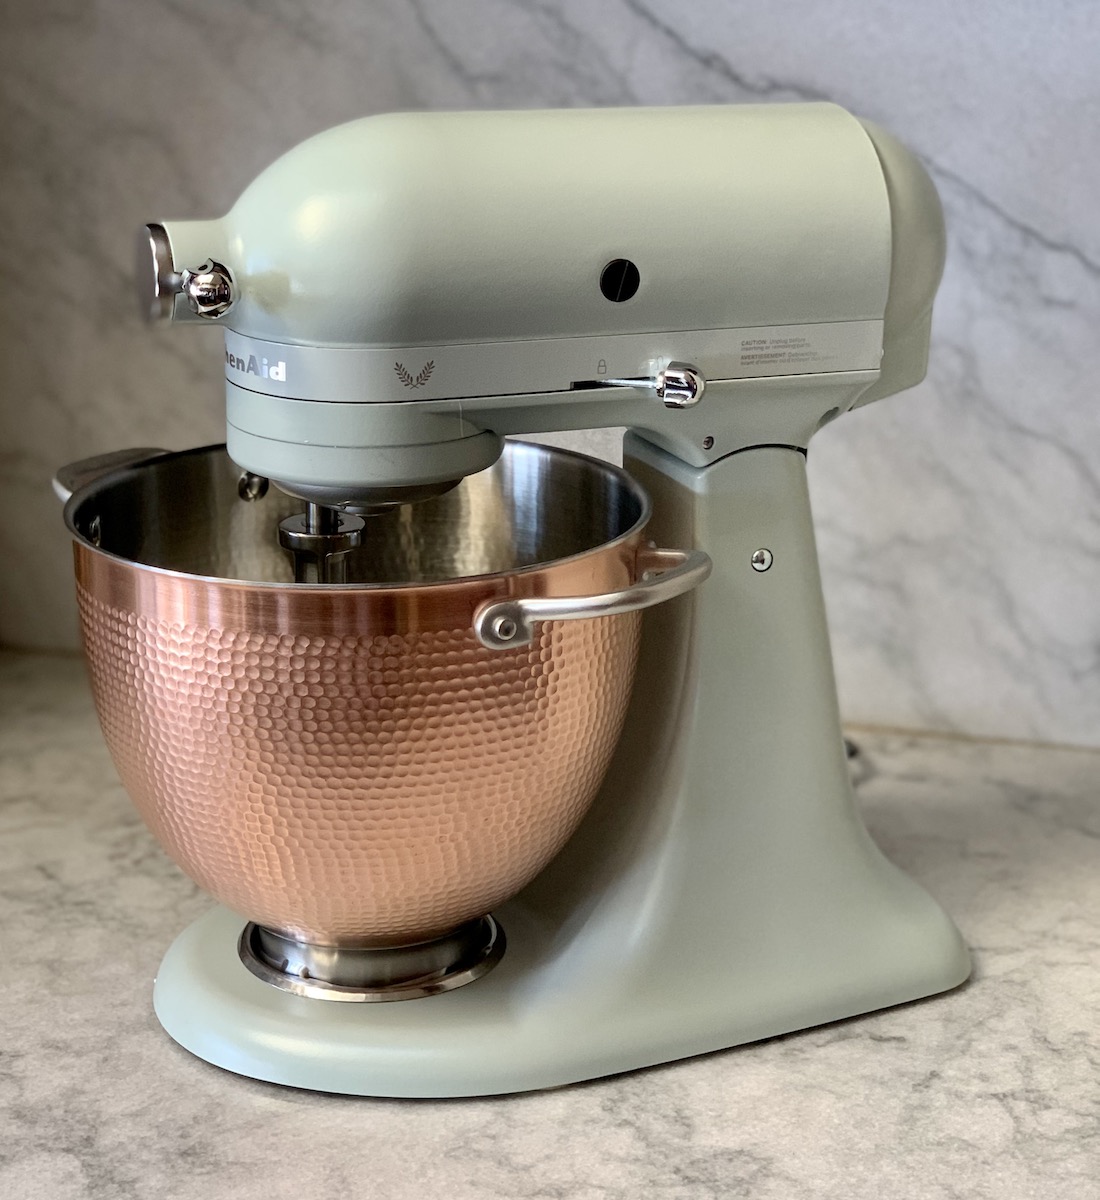
Thanksgiving is just days away and KitchenAid® has you covered for some tasty dishes you can enjoy creating with your Blossom! KitchenAid® Design Series Stand Mixer.
The Blossom! KitchenAid® Design Series Stand Mixer is a joy to use and you will love how it changes the design quality of your kitchen!
Here are a few recipes exclusively for you:
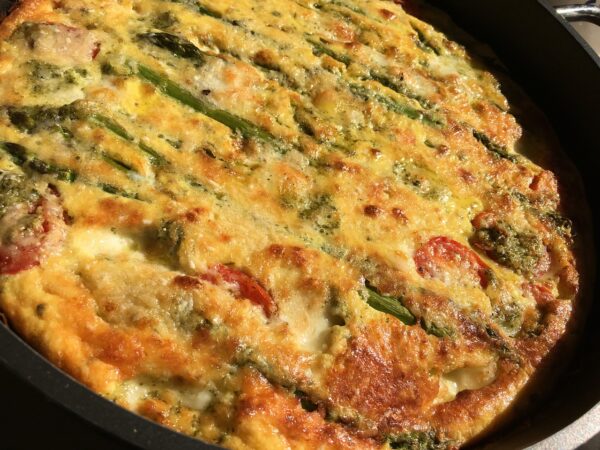
Asparagus and Chive Quiche
Ready in 3 hours
Makes 12 servings
EQUIPMENT
KitchenAid ® Stand Mixer
Pastry Beater
Whip
9″ x 13″ x 1″ quarter sheet pan
Ingredients
CRUST
2 ¼ cups (360g) all-purpose flour, plus more for dusting
1 tsp. (6g) kosher salt
2 sticks (226g) unsalted butter, cold, cut into ½” cubes
10–11 Tbsp. (112g) ice water, more if needed
FILLING
1 ½ cups (354ml) cream
½ cup (118ml) whole milk
6 large eggs
1 bunch (approximately 1 lb. or 16 oz.) whole asparagus spears, trimmed of woody ends
½ tsp. (3g) garlic powder
4 Tbsp. (12g) green chives, sliced, plus 5 to 8 whole sprigs for garnish
⅔ cup (65g) finely shredded cheddar or gruyere
½ cup (30g) finely grated Parmesan
2 tsp. (10g) kosher salt
½ tsp. (3g) freshly ground black pepper
Cooking spray
Preparation
PREPARE DOUGH
1. Add flour and salt into the bowl of your Stand Mixer with Pastry Beater attached. Mix just
for a few seconds to distribute the salt. Cut the cold butter into small cubes. Add it to the
flour and turn on Stand Mixer to Speed 7. When mixture resembles coarse meal,
gradually add 10 tablespoons of water while continuing to mix. Mixture should easily
hold together when pressed. If not, you can add 1 extra tablespoon of water at a time
until it holds better.
2. Tip dough out onto a lightly floured surface or a large sheet of plastic wrap and gather
into a rough 5" x 7" rectangle. Press to flatten. Wrap tightly with plastic wrap; chill in
refrigerator for 30 minutes or up to 5 days.
FORM CRUST
1. Spray a steel or aluminum quarter sheet pan with cooking spray, line with parchment
and spray that too. Set aside.
1. Roll out the chilled dough into a 10" x 14" rectangle on top of a lightly floured piece of parchment. Use a long knife to slide under the dough if it sticks to the parchment too much.
Using the parchment to lift, slide the dough and slide into the prepared pan.
1. Spread the dough with your fingertips to fill up the sides of the pan and above the lip by
at least ¼". If any cracking occurs, just use your fingertips to press back together. This dough is
forgiving. You can trim dough off sections where it's too generous and push it into spots that
need more.
1. Flute and push edges out so they rest on the lip of the pan. This ensures the crust is
deep enough for filling and won’t slide down when baked. The finished crust should look
crumbly and rustic. Prick all over with the tines of a fork and set in freezer for 20 minutes.
BAKE CRUST
1. Preheat oven to 425°F (218°C) and make sure there is a rack at the bottom of your
oven. Line frozen crust snugly with foil and add pie weights to the lip of the pan (beans or rice
work well). Bake for 30 minutes, or until the crust edge is light golden brown. Remove pie
weights and foil and cook 5 minutes more. Set aside to cool.
PREPARE FILLING
1. Boil water in a large stock pot. Peel the bottom half of asparagus and add to the pot.
Simmer for 3 minutes and remove with tongs. Transfer to an ice bath.
1. When asparagus has cooled, remove from the water and lay on paper towels to dry
completely. This keeps as much excess moisture as possible out of the egg custard.
1. Add cream and milk into the bowl of your Stand Mixer with Whip attached. Add eggs one
at a time while whisking on Speed 1. Add sliced chives, garlic powder, salt and pepper. Mix just
to blend.
1. Sprinkle cheese evenly over the bottom of the crust. Take half the asparagus spears and
lay lengthwise onto the crust and cheese. Pour filling into crust. Take the other half of the
asparagus and create another layer widthwise on top of the filling. Add whole chives to the
surface.
BAKE QUICHE
1. Drop the oven temperature to 400°F (204°C) and bake quiche on the bottom rack for
approximately 35 to 40 minutes, just until a small knife plunged into the center of the egg
custard comes out clean. If the edge of the crust begins to brown too quickly, you can cover it
with strips of foil.
1. Cool for at least 15 minutes, slice and serve warm.
TIPS
Roll out the dough sandwiched between plastic wrap so you can peel off 1 side of plastic and
flip the dough into the pan with ease.
To even out the bottom crust in the pan, use the back of a straight sided measuring cup to tamp
down the raw dough right before you prick with a fork and definitely before it goes in the
freezer.
You may get some minor cracking on the dough after the blind bake. Small cracks are ok. Just
fill it and move on with the recipe.
If using a nonstick pan, after removing pie weights and foil you will need to blind bake the crust
for an additional 10 to 15 minutes, until the base of the crust is cooked through and doesn't look
wet.
If you don’t have a quarter sheet pan, you can use a 9" x 13" x 2" cake pan. Make sure you fully
line the pan with parchment. In this case, only bring the dough up the sides of the pan by 1.5".
You should have extra parchment and space in the pan above the dough line. This will help you
pull the quiche out at the end so you can cut it easier. The pie weights need to come to the
same level as the dough in the blind bake. The edges of this quiche will have straight sides
without fluting.
Go slow when adding filling into the pre-baked crust. Don’t go over the top of the crust line or
the quiche will boil over in the oven. It is okay to discard a little filling left over to ensure proper
measurements.
Both chives and garlic have edible flowers. In the springtime, add the fresh flowers before
baking for a beautiful garnish.
Nutritional Information
Recipe makes 12 servings
Total nutrition value per serving
400 calories; protein 9g; carbohydrates 20g; fat 31g; sat fat 19g; cholesterol 176mg; sodium
720mg; dietary fiber <1g; sugars 2g; Vit D 1 mcg; Calcium 132mcg; Iron 2 mg; Potassium
122mg
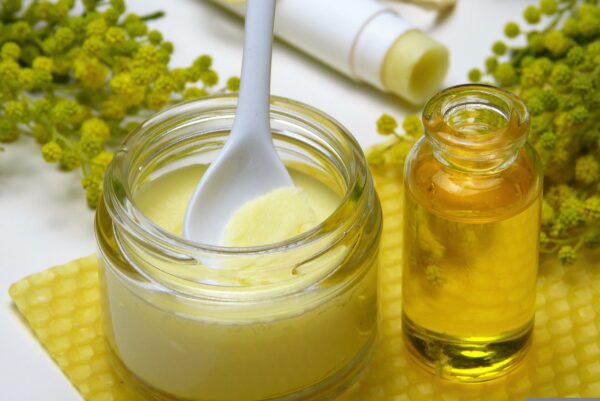
Herb and Flower Butter
Ready in 20 minutes
Makes 1 cup of butter + 1 cup of buttermilk
Preparation
WHIP BUTTER
1. Pour cream into the bowl of your Stand Mixer with Whip attached. Begin beating cream
at Speed 1, gradually increasing to Speed 10 as the mixture thickens.
2. After several minutes, whipped cream will form. Continue mixing. After several more
minutes the fat solids will separate from the liquids, and you'll see clumps of butter fat
begin to form, leaving liquid buttermilk in the bottom of the bowl. If liquid begins to
splatter, use a pouring shield or lay a small towel over the top of the Stand Mixer.
SEPARATE FROM BUTTERMILK
1. Strain fat solids from the buttermilk using a fine mesh strainer or cheesecloth over a
bowl to catch the buttermilk. Return fat solids to the Stand Mixer bowl without the buttermilk and
whip at Speed 10 again. You may be able to squeeze a bit more buttermilk out.
1. Scrape butter out of the Whip and place in the strainer. Pour cold water over butter to
rinse away any remaining buttermilk. Discard water and rinse butter twice more. You now have
spreadable, unsalted butter ready to be garnished.
ADD HERBS AND FLOWERS
1. Tear herb leaves and flower petals into small bite size pieces. Remove any stalks and
sepals. You don’t want a whole mouthful of a flower in your butter.
1. Spread butter on a tray and sprinkle with flowers, herbs and flavours. You can now
spread this on bread or crackers.
TIPS
Save buttermilk and store in the refrigerator to use in other recipes.
If you prefer to make plain unsalted butter, follow steps 1–4. Shape butter into a ball or mold into
a bowl, then store in the refrigerator.
Nutritional Information
Recipe makes the equivalent of 2 sticks of butter (16 tablespoons)
Serving size is 1 tablespoon
Total nutrition value per serving minus leftover buttermilk
100 calories; protein >1g; carbohydrates >1g; fat 12g; cholesterol 30mg; sodium 75mg;
fiber 0; sugar 0; Vit D 0; Calcium 5mg; Iron >1mg; Potassium 8mg
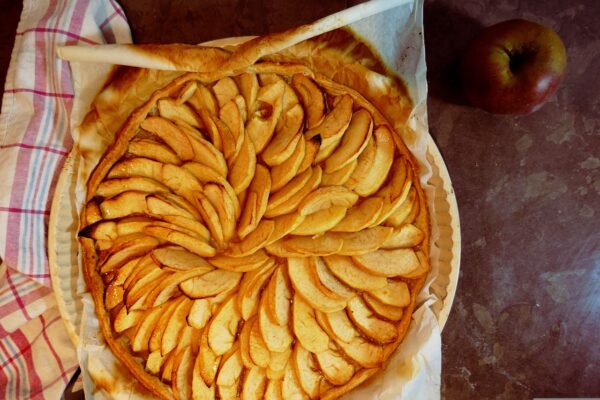
Apple Thyme Tart
Ready in 4 to 5 hours
Makes 8 serving tart
EQUIPMENT
KitchenAid ® Stand Mixer
Pastry Beater
Spiralizer Attachment
9 ½" metal tart pan with removable bottom
Ingredients
TART SHELL
2 sticks (225g) unsalted butter, soft but cool, about 65°F (18°C), cut into 1" thick
slices
¾ cups (170g) granulated sugar
1 (50g) large egg
1 (20g) large egg yolk
3 cups (425g) all-purpose flour plus more for dusting
2 tsp. (8g) kosher salt
2 Tbsp. (30g) heavy cream
1 Tbsp. (15g) vanilla extract
1 tsp. (5g) lemon zest
APPLE COMPOTE
2 cups (257g) Honeycrisp apple, peeled and cubed
2 Tbsp. (20g) sugar
¼ tsp. (1g) cinnamon
1 Tbsp. (12g) lemon juice
¼ cup (56g/2 oz./50 ml) apple juice
APPLE SPIRAL
4 medium Honeycrisp apples
3 Tbsp. (39g) unsalted butter
1 tsp. (6g) lemon juice
1 tsp. (6g) sugar
4 Tbsp. (48g) sweet orange marmalade
5 sprigs of thyme leaves
Preparation
PREPARE DOUGH
1. Combine butter and sugar in the bowl of a Stand Mixer with Pastry Beater attached. Mix at
Speed 1 to moisten, then increase to Speed 8 and beat until light and fluffy, about 5
minutes, pausing halfway through to scrape down the bowl and beater with a flexible
spatula.
2. With Stand Mixer at Speed 5, add egg and egg yolk one at a time, allowing each to fully
incorporate before adding the next and pausing to scrape down bowl and beater between
each addition, about 1 minute total.
3. With Stand Mixer turned off, add flour, lemon zest and salt to the bowl. Turn Stand Mixer to
Speed 1 and mix until dough is crumbly, about 30 seconds.
4. With Stand Mixer still running at Speed 1, pour in cream and vanilla. Mix until dough comes
together, about 15 seconds.
5. Scrape dough onto a lightly-floured work surface. Divide into 2 equal portions and shape
into flat, round disks. Wrap each disk tightly in plastic wrap and refrigerate for at least 2
hours. You can freeze the second disc for up to a month.
SHAPE TART SHELL
1. Working with one portion of the dough, set the dough disk on a generously floured work
surface. Using a rolling pin and adding more flour as needed to prevent sticking, roll out to a 13"
circle that’s about ⅛" thick.
1. Use cooking spray to grease the metal tart pan with removable bottom.
1. Transfer dough to the tart pan by carefully wrapping dough around the rolling pin, then
unrolling over the pan. Use a dry pastry brush to press dough gently yet firmly into the corners
and up the sides of the pan. With scissors or kitchen shears, trim off excess, leaving ¼"
overhang all around. Freeze for 1 hour.
BAKE TART SHELL
1. Adjust oven rack to center position and preheat to 350°F (177°C). Remove tart pan from
freezer. Using a paring knife, trim dough overhang around the edge so dough is level with the
top of the pan. Line tart shell with aluminum foil, fully covering the bottom and sides and letting it
hang over the edges a little to protect from overbrowning. Fill aluminum foil with pie weights
(beans or rice work well) to the top of the dough line.
1. Set tart pan on a sheet tray and bake for 35 minutes, rotating the tart halfway through.
When done, remove foil and weights and let cool.
MAKE APPLE COMPOTE
1. Combine all ingredients in a medium sauce pot and cook uncovered on medium-high
heat for 10 minutes, until most of the liquid has evaporated. Use a masher to mash the apples
into rustic chunks. Put in the refrigerator to cool until needed.
SPIRALIZE AND SOFTEN APPLES
1. Attach the Spiralizer to your Stand Mixer. Use the peeling blade and slicing blade (large
core) to peel and spiral cut apples. Once the apple is done, turn the machine off and remove the
apple. Take the whole spiral cut apple and set it on a cutting board right side up. Use a knife to
cut it in half to create half moon apple slices. Repeat with remaining apples.
1. Heat a 10" skillet on medium high. Melt butter and add apple slices. Add 1 teaspoon
lemon juice and 1 teaspoon sugar. Very carefully mix apples without breaking them. Sauté for 4
to 6 minutes until they are softened and pliable enough to curl.
ASSEMBLE TART
1. Remove apple compote from the refrigerator. Spread onto the base of the cooled tart
shell.
1. Start creating a pretty spiral of apple slices on the top of the tart. Starting near the outer
crust, lay the apple slices 1 by 1 overlapping. Keep moving towards the center of the tart. If the
apples won’t curl once you get in the middle of the tart, microwave the apples at 1 minute
intervals. This will continue to soften them, making it easier to create the spiral center.
1. Thin the orange marmalade with a little water and melt in the microwave for 30 seconds.
Add thyme leaves and mix.
1. Use a pastry brush to carefully brush half the marmalade over the top of the tart.
Reserve the other half for after you bake.
1. Bake the tart on a sheet pan in the middle rack of your oven for 25 minutes, rotating
halfway. Remove and let cool.
1. Use a pastry brush to add a final coating of orange marmalade and thyme mix to the top
of the baked tart for a shiny finish.
1. Remove tart from pan and transfer to cutting board. Cut into 8 slices. Serve with
whipped cream or vanilla ice cream.
TIPS
If you cannot find sweet orange marmalade, you can replace it with apricot preserves.
Many brands of marmalade include the rind and skins of the fruit. If you prefer a smoother finish
for your tart, you can strain out these chunks.
Use a quality apple juice with no added sugars to control the sweetness of your tart.
Nutritional Information
Recipe makes 8 servings
Total nutrition value per serving
636 calories; protein 7g; carbohydrates 85g; fat 30g; cholesterol 125mg; sodium 600mg;
fiber 5g; sugars 23g; Vit D 0mcg; Calcium 46mg; Iron 3mg; Potassium
About KitchenAid
Since the introduction of its legendary stand mixer in 1919 and first dishwasher in 1949, KitchenAid has built on the legacy of these icons to create a complete line of products designed for those with a passion to make. Today, the KitchenAid® brand offers virtually every essential for the well-equipped kitchen with a collection that includes everything from countertop appliances to cookware, ranges to refrigerators, and whisks to wine cellars. To learn more, visit KitchenAid.ca or follow us on Instagram, @KitchenAid_ca.
Recipes provided by Michaela Kelly, Hill+Knowlton Strategies. photo credits: asparagus quiche Image by Ida Bjørnstrøm, Herb and Flower butter by Silvia, Apple Thyme Tart by Dgraph88. Feature image: KitchenAid stand mixer image by MyVanCity. #sponsoredpost