Are you looking for simple, fresh, summer recipes to help make entertaining even your pickiest guest an easy and enjoyable experience?
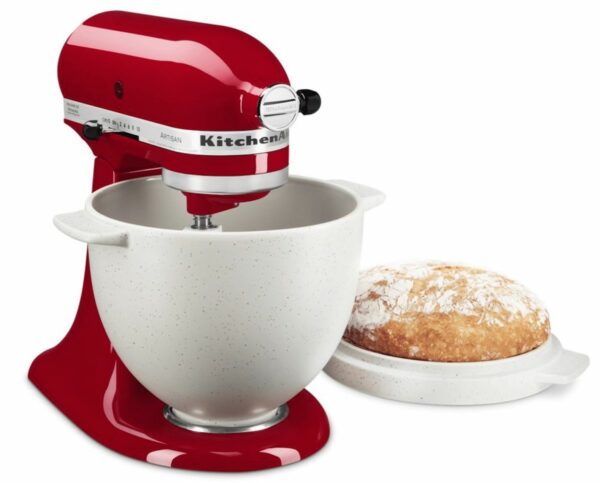
KitchenAid’s iconic Stand Mixer and its newest attachments like the Bread Bowl offer endless culinary possibilities in the kitchen and we have the amazing recipe to prove it!
· The Bread Bowl with Baking Lid is an all-in-one set that lets you easily mix, knead, proof and bake – providing you with everything you need to feel confident in your bread-making game.
o Perfect for summer, get creative with a sweet and flavourful Cranberry Oat Walnut Bread.
Cranberry Oat Walnut Bread
PREP TIME: 5 minutes (plus 1 ½ – 2 hours for total rise time)
BAKE TIME: 40 minutes
SPECIAL EQUIPMENT: KitchenAid® Bread Bowl with Baking Lid; KitchenAid® Artisan Stand Mixer with dough hook; parchment paper; kitchen scale
INGREDIENTS:
2 ½ cups (344g) all purpose flour
½ cup (45g) quick cooking oats
2 ¼ teaspoons (6g) rapid rise yeast
1 teaspoon (8g) sea salt
½ teaspoon cardamom
3 tablespoons (63g) honey
⅓ cup (38g) walnuts, crushed
⅓ cup (43g) dried cranberries
1 ½ cup (355ml) warm water
DIRECTIONS:
Prepare all your ingredients at your workstation. Warm the KitchenAid® Bread Bowl by filling it with hot water – then, pour out the water and pat dry. Add all the ingredients into the Bread Bowl. Use a pastry spatula or wooden spoon and stir ingredients together until just moistened. Affix the dough hook to your KitchenAid® Artisan Stand Mixer. Turn the mixer to speed 2. Allow the mixer to knead the ingredients for about a minute – or, until the dough starts to form but is still wet. Do not over knead. Remove the bowl from the stand mixer, generously flour the bowl and the top of the dough with all purpose flour, and use your hands (or pastry spatula) to gather the dough and turn it in the flour. Lightly sprinkle a bit more flour on the top, then cover the bowl with the lid. Allow the dough to rise for 1 – 1 ½ hours, or until it has reached close to the top proofing line.
Uncover the bowl and, with floured hands, gently pull the dough from the sides of the bowl into a ball, and then place the ball onto a floured surface. With dough in a rough round in front of you, pinch the top of the dough, stretch it away from you, then fold it into the center of the dough like you are folding an envelope. Give the dough a slight twist and do the same thing to the portion now at the top. Continue turning, stretching and folding the dough into the center for three to four full circles. (You will notice it gets harder to stretch the dough as you work.) After the final stretch and fold, flip the dough over, fold side down. Sprinkle a couple tablespoons of the oats onto the counter into a circle about the size of your loaf, and place the loaf on the oats. Gently place both hands on each side of the round and gently curl your right palm around the right edge while using your left hand to rotate the round on the surface. (As you rotate the loaf, the oats will press into the dough.) This action will smooth the dough into a round mound.
Let the dough sit in place while you quickly wash out the bread bowl and dry it thoroughly. Lightly flour the clean inside of the Bread Bowl and return the dough, seam side down, to the Bread Bowl. Cover the bowl with the lid and allow it to rise for 30 more minutes. (Dough should feel marshmallowy when gently pressed with a finger.)
While dough is on second rise, preheat the oven to 450°F/232°C. (NOTE: Set your rack as close to the center of the oven as possible while still leaving enough height for the lidded Bread Bowl to fit.) When ready to bake, remove the lid from the Bread Bowl and line the inside of the lid with a round of parchment paper. Carefully invert the round from the Bread Bowl onto the parchment covered lid (so the fold side is now facing up) being careful not to deflate it or disturb the shape. Dust out the excess flour from the Bread Bowl, then cover the dough with the Bread Bowl and place in the oven. Bake for 30 minutes. Then, remove the Bread Bowl to expose the bread and finish baking for 10-12 more minutes, or until the crust is crispy golden brown and hollow when you knock on it. Remove to a cooling rack and let cool before slicing.
Chef’s Notes:
It’s always best to weigh the flour when making bread. If you don’t have a kitchen scale, do not pack the flour when measuring. Simply ‘fluff’ the flour before filling your measuring cup, then use the back of a kitchen knife to push off any excess above the rim.
There is no need to score the top of this bread when baking. When the dough is inverted onto the lid after the second rise, there are natural cracks (from the stretch and fold process) that will expand and give this bread the perfect artisan loaf look.
Bread Bowl with Baking Lid (KSM2CB5BGS)
MSRP $229.99
· Bake craft-quality bread at home
· One bowl baking from mixer to oven
· Long-lasting, durable ceramic design
· 5 Quart Capacity for just the right loaf
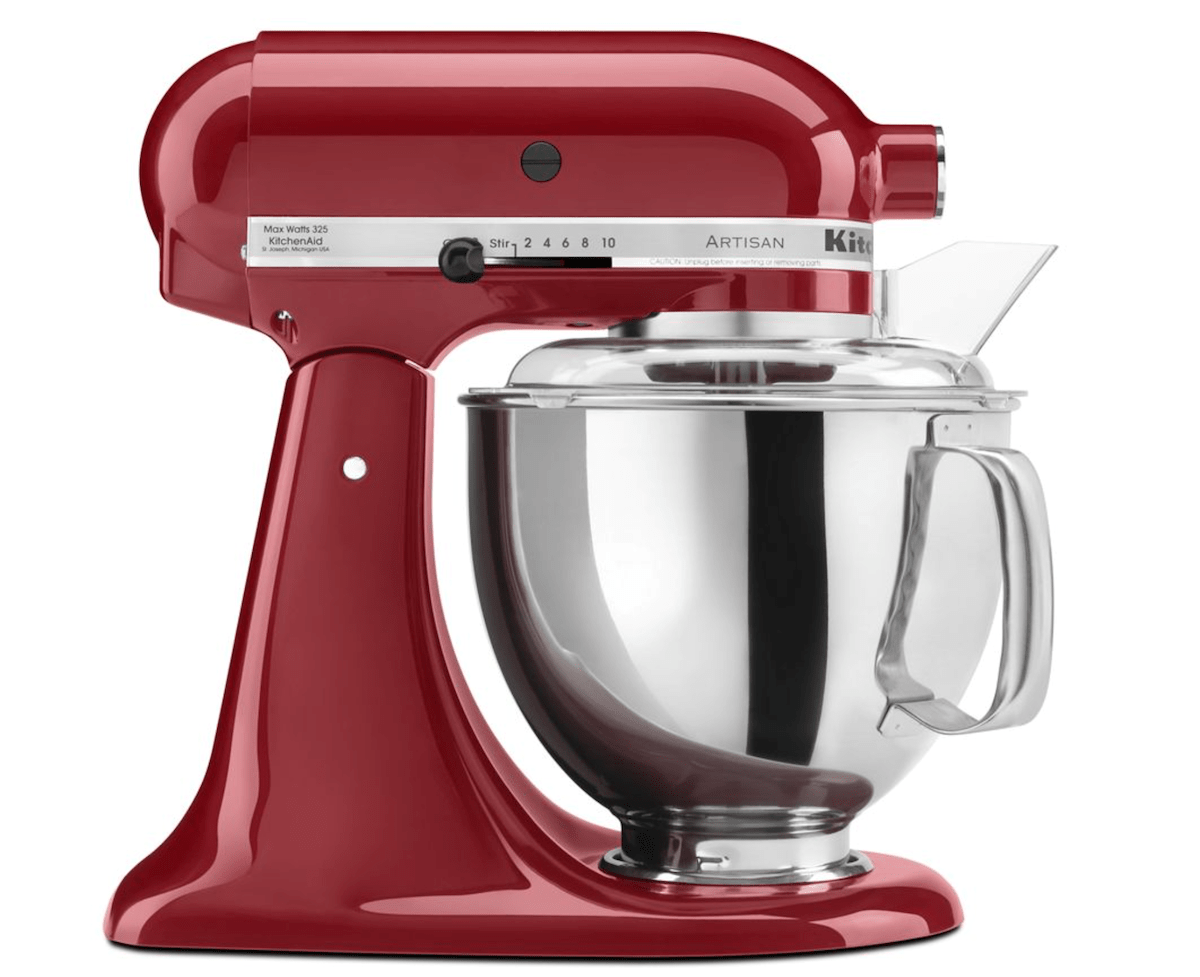
KitchenAid Artisan Series 5-Quart Tilt-Head Stand Mixer (KSM150PSER)
MSRP $629.99
· 5 Quart Capacity for Small or Large Batches
· Easily add Ingredients with the Tilt-Head Design
· 10 Speeds for Nearly any Task or Recipe
· Match your Style with Over 20 Colours Available
Recipes, images and product information provided by Michaela Kelly, Hill + Knowlton Strategies. I received a complimentary Kitchenaid mixer and accessories to facilitate this feature.